Well hello there,
This past few months have been a little hectic to say the least, little time for anything but sleep and work and that was fitting it around the children. In all that hecticness, I still found time to get a Tuesday evening off and head to a dressmaking class. It's only a small group, but sometimes I just need to be shown what to do!
So the lovely Sandy has helped me work through a patterned piece from an envelope! Haha, mad right, especially with the thousands of new designs and patterns downloadable at a drop of a hat. I chose a skirt.
The McCalls M3341 pattern. I chose Skirt E for work.
Some handy tips I learned from doing this skirt were to:
 |
M3341 MISSES' A-LINE SKIRTS IN FIVE LENGTHS |
- cut out the largest pattern (just in case you want to use it at a later date with a larger size).
- I learned tailor tacking - however this one seemed useful but very long-winded compared to other ways of tracing patterns on the fabric.
- Baste stitching is also VERY useful - especially for zips!
What isn't useful is what I had done next. Near to the end, I was happily plodding along with almost finishing it. I had sewn the side seams as I was supposed to, the facing was all done and added to the waistband, then all that was left was to hand sew the facing to the pressed out side seams. Now on the pattern instructions it didn't specify which way the side seams needed pressing so I pressed them open because on the picture the facing was sewn to the side seams open. So that's how I happily continued for that day.
Ok so I looked at the skirt and was trying to suss out the length I wanted it. Then I looked at the side seams again and the excess was quite a lot, about an inch or so each side. There was no mention about cutting them down or anything so as they were pressed open the only option I could see was to sew using the machine on each side (4 in total) to stop the fabric from fraying, it was a linen type cotton after all, then to cut them down. I looked up the best stitching for this and apparently a zig zag stich was the preferred option. It seemed odd but noone was going to be seeing this part and I wanted to make sure that it didn't fray. So I zig zag stitched and cut off the excess.

Here's an example on Tilly's blog

Then here is the squeamish part, the part that was utterly devastating after making this skirt over a period of 8 weeks (the long-winded way). Whilst cutting the excess off, I cut into the back of the skirt. I was so very upset. I am still agonising over what to do about it. Suggestions were using interfacing, fabric glue, embroidery, but I'm just not sure!
It is for work after all, patterns are a no-go and plain skirt is all that is allowed. I will be measuring out a pen pocket to see if that is something that will be feasible. I would love to know your thoughts? let me know :)
**UPDATE**
It has taken me since forever to get going on this skirt again. I lost motivation, then I regained it. I tested interfacing AND fabric glue, neither were successful without seeing it from the outside. Indeed I then made myself a pen pocket! How about that!
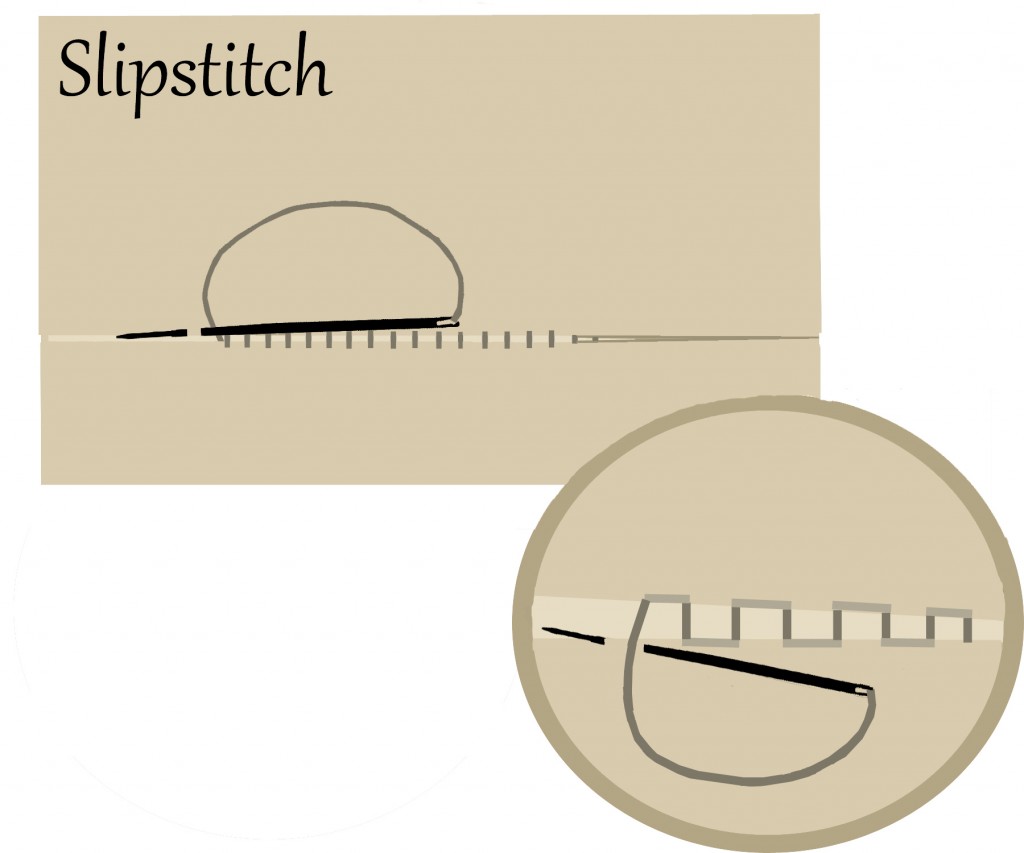 |
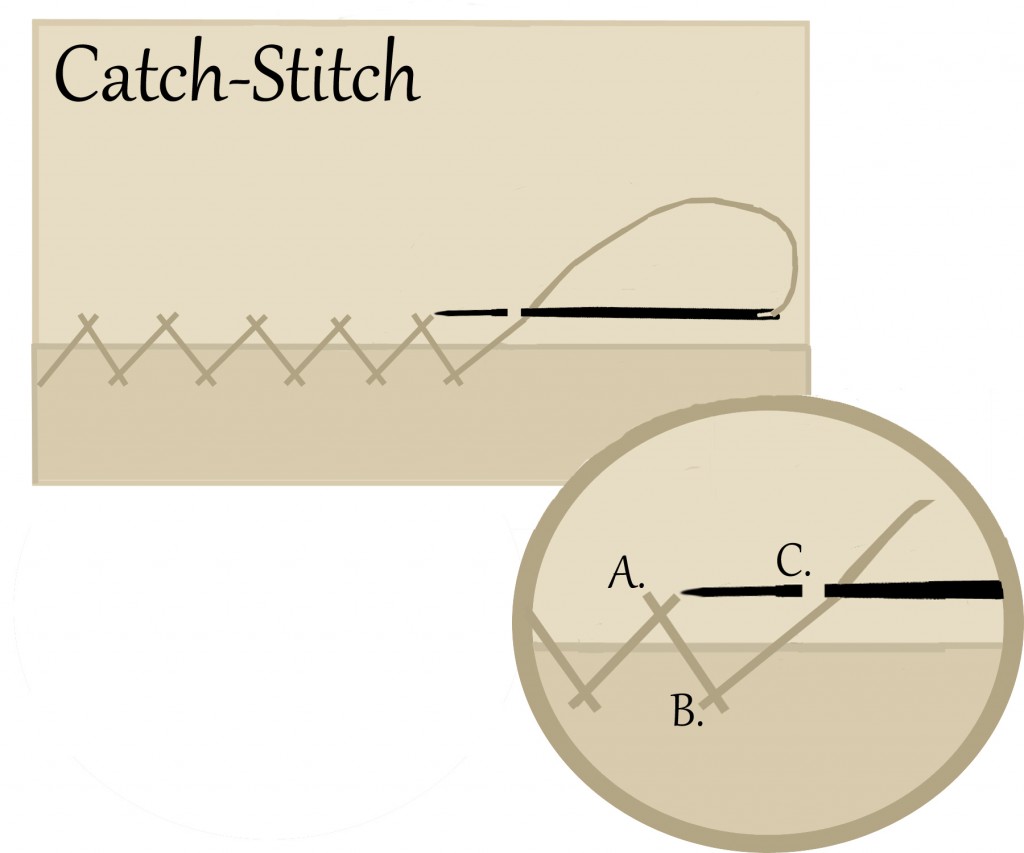
| Both pictures can be found here: http://yesterdaysthimble.com/tutorials/basic-hand-sewing/ |
I learned the slipstitch, invisible stitch? which attached the pocket firmly. I then pressed it into place.
I then moved onto the last but not least part of the skirt. The hem.
This was interesting, I basted it in place -this seems quicker, firmer and easier than needles - then I used another type of stitch. Blindhem stitch OR a catch-stitch, I believe it may have another name also, herringbone stitch.
I plodded away and finished up the hem!
And then, oh no! I forgot to "finish" the raw edge, which is definitely needed on this fabric.
So a friend suggested that I should slip it under the machine with as much of the skirt folded back as possible, then finish it with a zigzag stitch. HOWEVER, I decided to undo the whole hem, why? because I have made countless mistakes so far and would like a nice finish to the skirt. What if the sewing machine caught up a bit of the main skirt? or I managed to birdsnest the thread or something silly... I would have wasted all that time with very little hope of salvaging it!
I got on with removing the lovely hem that I had finished. Then, my NEW sewing machine arrived!
The Silver 9000e. It is a fantastic machine for the price that it comes at. I had two local dealers try and persuade me to buy known brand machines that had no comparison with what this machine can do.

Anyway, carrying on. I used the overlocking stitch - by no means does this replicate an actual over locker though, you have to cut the fabric off yourself ;)
So now I am ready to finally FINISH THE HEM!!!
Come back for pictures tomorrow and I shall also add the pen pocket tutorial - I couldn't find one of these anywhere!
No comments:
Post a Comment